Splunk + ServiceNow Integration
Keeping your data consistent is a must—it’s what drives accurate insights and better decision-making. With AI tools becoming more common—and relying heavily
on clean, up-to-date data—this need is even more critical. But here’s the issue: nearly 40% of users still face challenges with inconsistent data.
That’s where integration comes in. It helps keep data flowing smoothly across systems while maintaining consistency. Of course, it’s not without its challenges,
especially when it comes to security. Enter the Splunk-ServiceNow integration—a game-changer for spotting and stopping potential cyber threats.
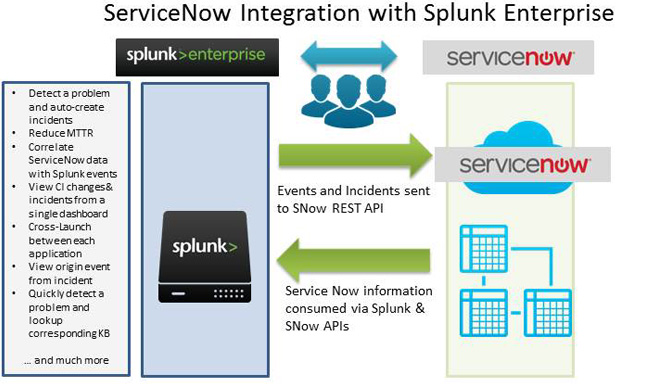
What Is the Splunk-ServiceNow Integration?
This integration connects Splunk Enterprise with ServiceNow’s Security Incident Response (SIR) module. In simple terms, it lets you bring real-time and historical data from Splunk alerts and events into ServiceNow for better security management.

It also supports automatic and on-demand data ingestion, customizable field mapping, and aggregation to avoid duplicate incidents. So, combining Splunk’s analytics with ServiceNow’s workflows enhances threat detection, investigation, and remediation. This way, security operations teams will have better tools to manage cyber threats efficiently and effectively.
Requirements for Integration
Below are the Prerequisites that we require to collect the logs from ServiceNow:
- Splunk Add-on for ServiceNow
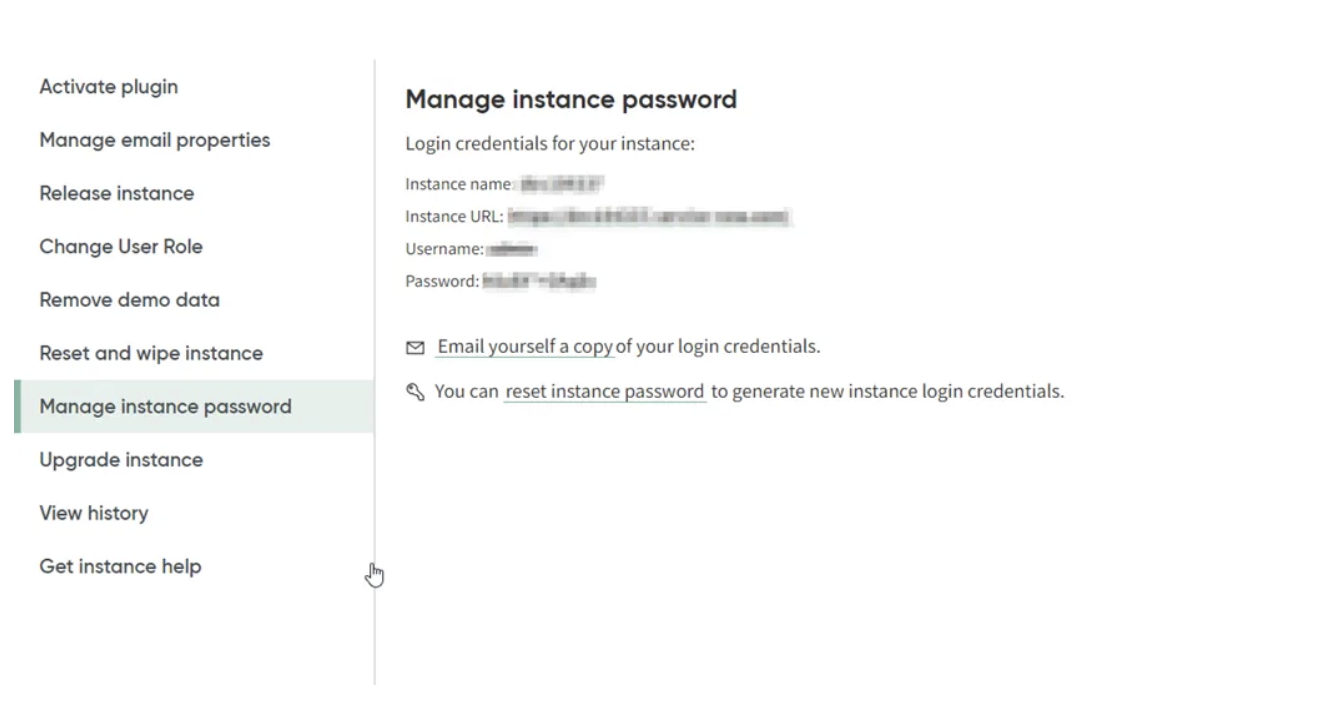
- ServiceNow Instance URL
ServiceNow
- We require User Credentials to configure the account on Splunk Add-on for ServiceNow.
- Request for a New Developer Instance, Once you signed in to the ServiceNow.
Splunk
- Log in to the Splunk Instance
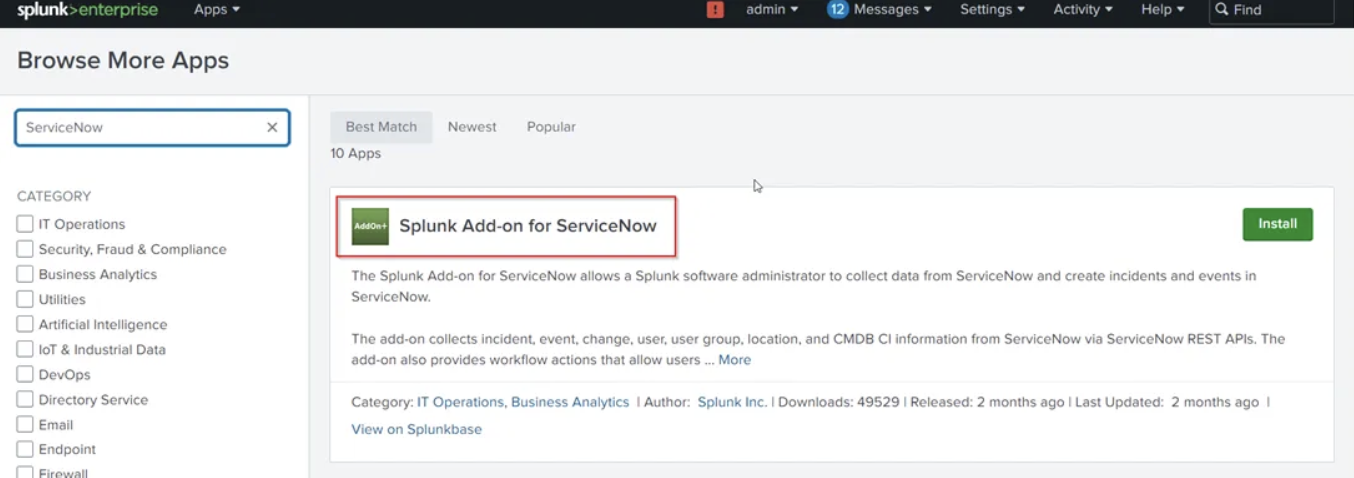
- Download the Servicenow Add-on (https://splunkbase.splunk.com/app/1928)
- Go to Apps → Manage Apps → Browse More Apps
- Filter for ServiceNow Add-on
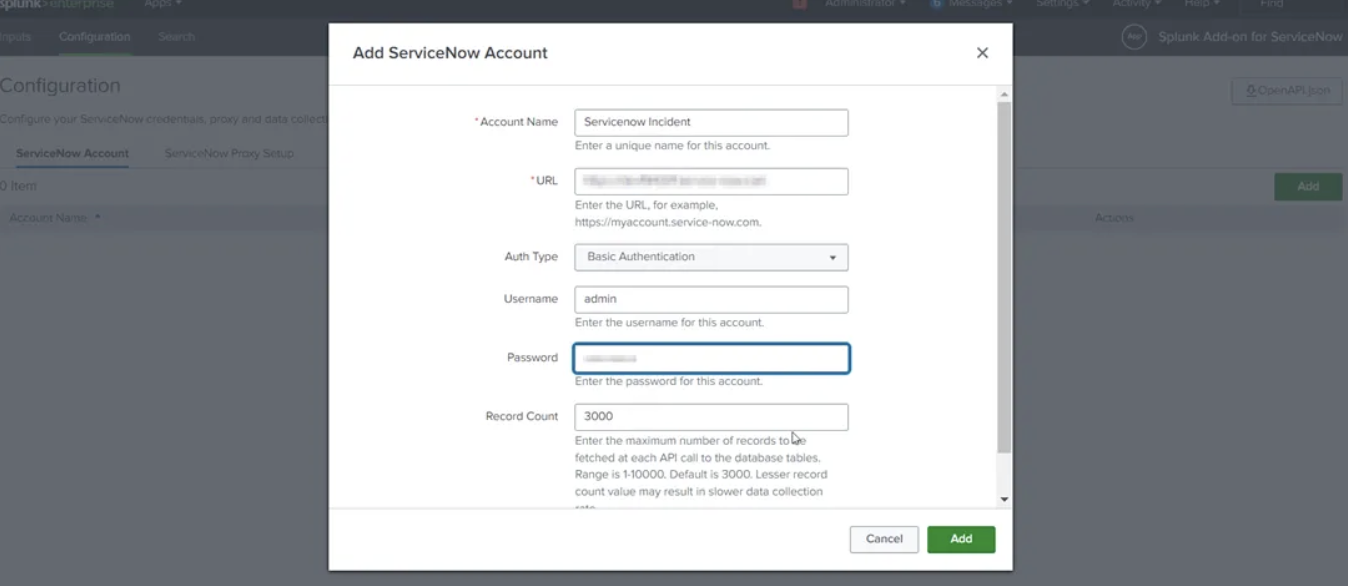
- Now Open the Add-on, Configure the ServiceNow Account
- Click on Add. Now, it will ask to enter the credentials
- Create an index in Splunk
- As Account setup is completed. Let’s move on to the inputs configuration
- Go to Inputs Section in Add-on
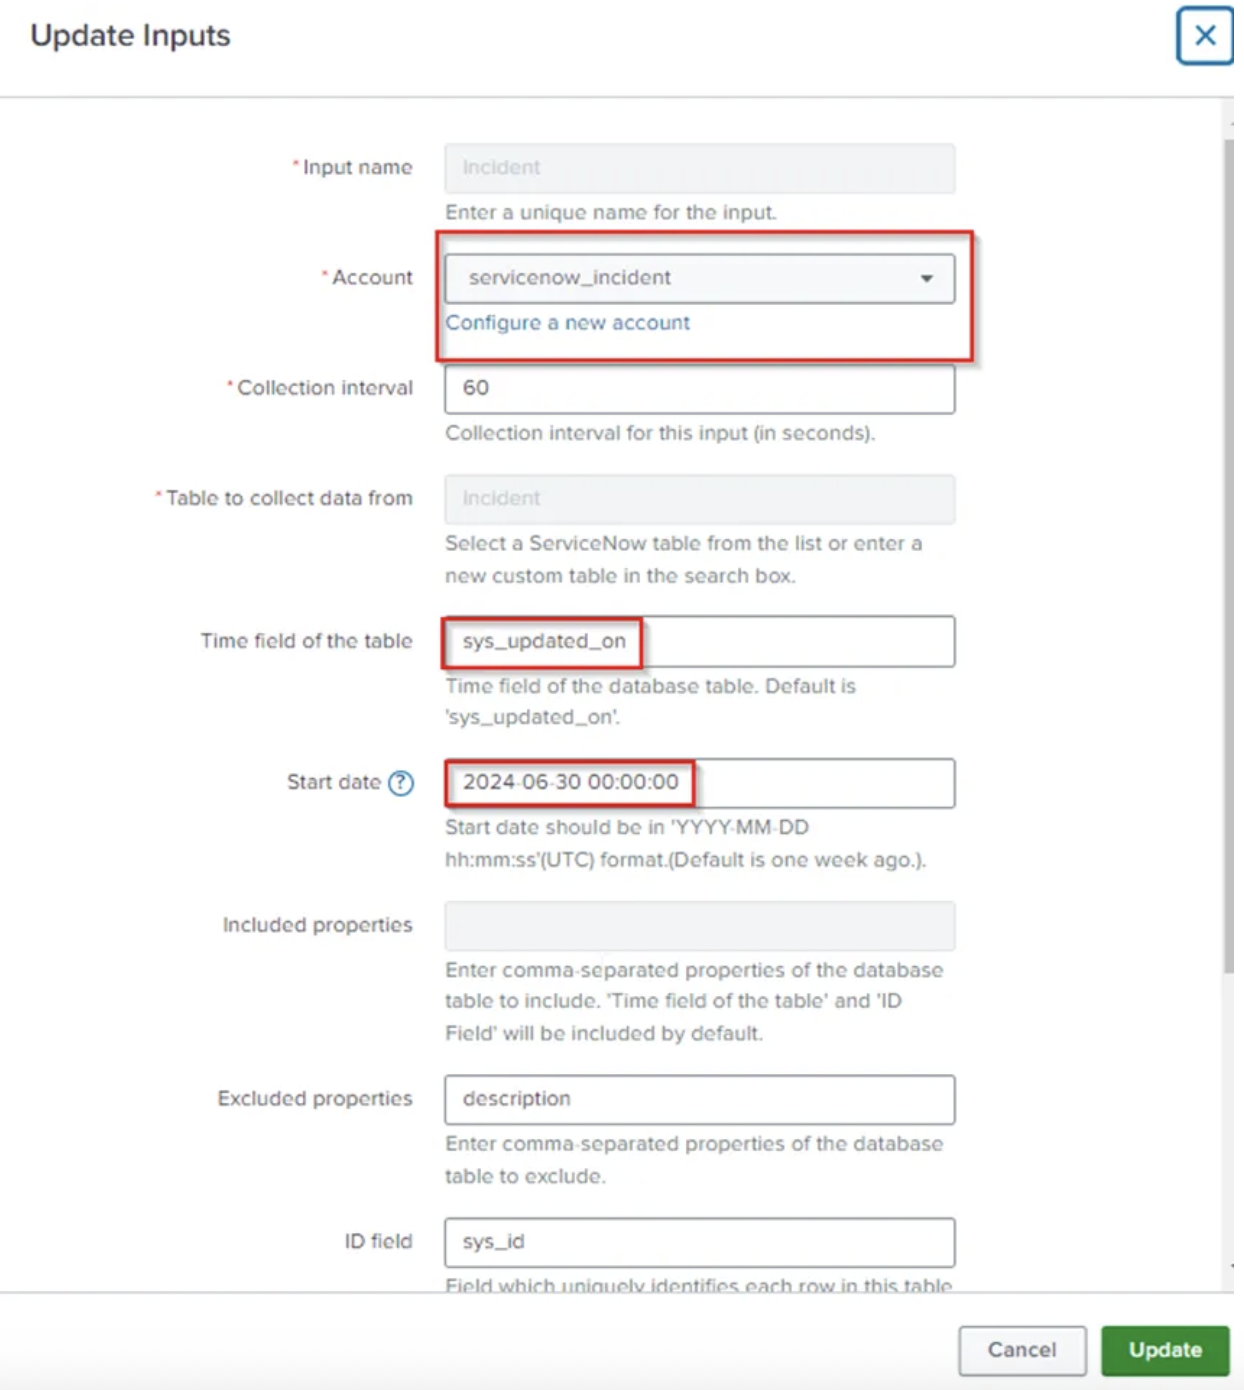
- Select the Incident Input and edit the input
- Select the Account Name that we configured
- Enter the Start Date i.e., from when you want to collect the data
- Enter the Index Name which you want to Collect the data
- Click on Update
- Once Input is Enabled, Verify the data is reflecting in Index On Search Head
- Once the data is Searchable, We can create our own Custom Dashboards & Get the Insights on Incident Response


Summary and Conclusions
Maximize your service experience by integrating ServiceNow and Splunk. You can use high frequency of events that allows you to analyze a massive number of insights in record time. Learn how to continuously detect, monitor, remediate, and mitigate risks.
Author

Sagar Mehta is Atgen Software Solutions Founder and a recognised expert in the field of Intelligent Automation, including Robotic Process Automation, Workload Automation, DevOps, SRE and Advanced Analytics. Sagar advocates a pragmatic approach to Automation, encouraging a policy of using ‘the best tool for the job’.
Prior to co-founding Atgen Software Solutions, Sagar worked in Senior Automation roles, architecting and delivering robust, scalable solutions for many of the world’s biggest banks and working with leading Automation vendors. He developed his first automated solution in 2006 and has continued to deliver robust, scalable and sophisticated Automation ever since.
Sagar is a regular guest speaker and panellist at Automation seminars, conferences and user group events.
Contact
Have a similar problem to solve, let's work together.
Our Address
#107, Tower B, Escon Arena, Zirakpur, Punjab, India - 140603
Email Us
info@atgensoft.com
Call Us
+91-8806666141